- Set up prerequisites
- Set up the project in your computer
- Implement increments while committing code frequently:
Level-1,Level-2,Level-3,Level-4,A-TextUiTesting,Level-5,Level-6,A-Enumsby Thursday 2359
iP (and the tP) undergoes changes after each semester. As such, teething issues are a possibility. If you encounter any problem while doing iP/tP, please post in the forum so that we can take necessary actions.
1 Set up prerequisites
Ensure you have met the following prerequisites:
Prerequisites:
- Install Git in your computer.
- Have a GitHub account.
- Recommended: Installed an IDE in your computer.
Relevant: [

Tools Used: Learning Management System
This module website is the main source of information for the module. In addition, we use LumiNUS for some things (e.g., webcasts, announcements, file submissions, grade book, ...).
Tool Used: GitHub (for Code Hosting)
You are required to use GitHub as the hosting and collaboration platform of your project (i.e., to hold the Code repository, Issue Tracker, etc.).
Preparation:
Create a GitHub account (if you don't have one yet), as explained in the panel below.
Relevant: [
Create a personal GitHub account if you don't have one yet.
-
You are advised to choose a sensible GitHub username as you are likely to use it for years to come in professional contexts.
-
Strongly recommended: Complete your GitHub profile. In particular,
- Specify your full name.
- Upload a profile photo that matches
our requirements .
The GitHub profile is useful for the tutors and classmates to identify you. If you are reluctant to share your info in your long-term GitHub account, you can remove those details after the module is over or create a separate GitHub account just for the module.
-
You are discouraged from changing your GitHub username during the semester/exam/grading period as it can cause our auto-grading scripts to miss your GitHub activities. If you do change your GitHub username during that period, please let us know immediately.
The purpose of the profile photo is for the teaching team to identify you. Therefore, choose a recent individual photo showing your face clearly (i.e., not too small) -- somewhat similar to a passport photo. Some examples
can be seen in the 'Teaching team' page. Given below are some examples of good and bad profile photos.
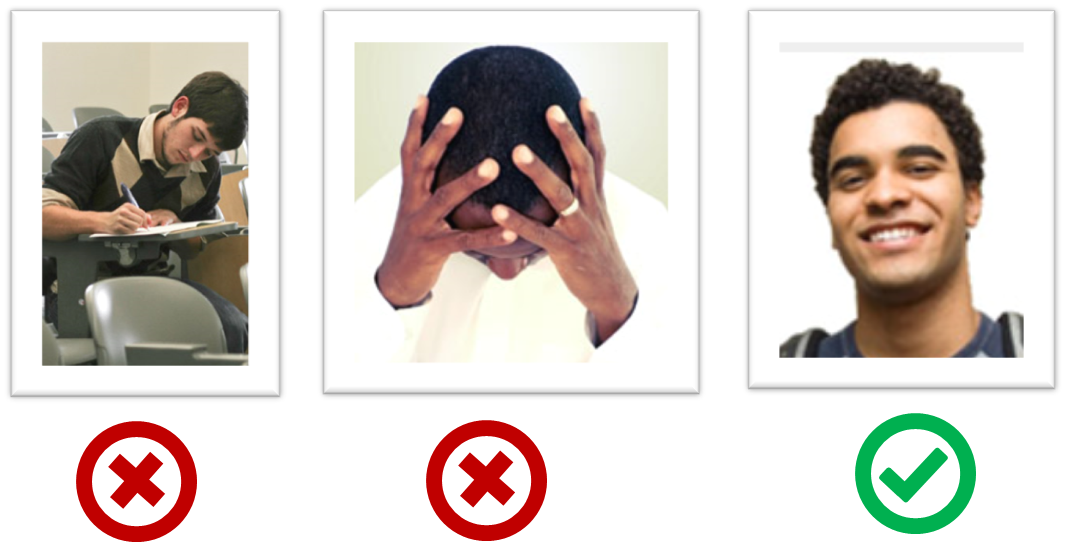
If you are uncomfortable posting your photo due to security reasons, you can post a lower resolution image so that it is hard for someone to misuse that image for fraudulent purposes. If you are concerned about privacy, you may use a placeholder image in place of the photo in module-related documents that are publicly visible.
More info: See Appendix E - Using GitHub.
Tool Used: Git (for Revision Control)
You are required to use Git. Other revision control software are not allowed. The recommended GUI client for Git is SourceTree, but you may use any other, or none.
Preparation:
Install Git and a Git GUI client on your computer.
SourceTree comes with bundled with Git i.e., if you install SourceTree, you get both Git and a GUI client in one shot.
Set Git user.name: We use various tools to analyze your code. For us to be able to identify your commits, we encourage you to set your Git user.name in all computers you use to a sensible string that uniquely identifies you. For example, you can to GitHub username or your full name as your Git username. If this user name is not set properly or if you use multiple user names for Git,
our tools might miss some of your work and as a result you might not get credit for some of your work.
After installing Git in a computer, you can set the Git username as follows:
- Open a command window that can run Git commands (e.g., Git bash window)
- Run the command
git config --global user.name YOUR_GITHUB_USERNAME(omit the--globalflag to limit the setting to the current repo repo)
e.g.,git config --global user.name JohnDoe
More info about setting Git username is here.
Tools Used: for Communication
- The preferred channels for module-related communication is the
forumon GitHub https://github.com/nus-cs2103-AY1920S2/forum/issues (not the LumiNUS forum) - When communicating with instructors, use the forum. Use private channels (e.g., emails, private messages, face-to-face, private chat groups) only when the forum is not suitable. Rationale: 1. More classmates can benefit from the discussions, 2. It is also safer because the prof can monitor information you receive for accuracy.
- You are encouraged to help others in the forum (e.g., share tips, help with technical problems). We consider such sharing when giving out
A+grades and when recruiting tutors.
Preparation:
We encourage you all to,
- watch the forum to get alerts when new issues/comments are posted

Tool Used: Intellij IDE
You are recommended to use Intellij IDEA for module-related programming work. While the use of Intellij is not compulsory, note that module materials are optimized for Intellij. Use other IDEs at your own risk.
Preparation:
- Install the IDE in your computer. You may use the Intellij community edition (free) or the ultimate edition (free for students).
- If you have an older version of the IDE, we recommend updating to the latest version (i.e., 2019 edition).
Tool Used: RepoSense (for Analyzing Code Authorship)
We will be using a tool called RepoSense to make it easier for you to see (and learn from) code written by others, and to help us see who wrote which part of the code.
Viewing the current status of code authorship data:
- The report generated by the tool will be made available at tP Code Dashboard at some point in the semester. The feature that is most relevant to you is the Code Panel (shown on the right side of the screenshot above). It shows the code attributed to a given author.
- Click on your name to load the code attributed to you (based on Git blame/log data) onto the code panel on the right.
- If the code shown roughly matches the code you wrote, all is fine and there is nothing for you to do.
2. If the code does not match the actual authorship:
-
Here are the possible reasons for the code shown not to match the code you wrote:
- the git username in some of your commits does not match your GitHub username.
- the actual authorship does not match the authorship determined by git blame/log e.g., another student touched your code after you wrote it, and Git log attributed the code to that student instead
-
In those cases, you can provide more information to RepoSense to rectify the situation, in the following way:
For simple cases such as the following, you can create a PR to update our config files here. The meaning of the config files are given in the RepoSense user guide.
- missing some commits due to using multiple git
user.names - some commits/files need to be omitted from the analysis
For more complicated needs, follow the instructions below this box. If you are not sure which option to use, please post in the forum to ask.
- Install RepoSense (see the Getting Started section of the RepoSense User Guide)
- Use the two methods described in the RepoSense User Guide section Configuring a Repo to Provide Additional Data to RepoSense to provide additional data to the authorship analysis to make it more accurate.
- If you add a
config.jsonfile to your repo (as specified by one of the two methods),- Please use the exact partial name from here as the display name.
e.g.,"displayName": "ABDUL ... JAVID", - If your commits have multiple author names, specify all of them
e.g.,"authorNames": ["theMyth", "theLegend", "The Gary"] - Update the line
config.jsonin the.gitignorefile of your repo as/config.jsonso that it ignores theconfig.jsonproduced by the app but not the_reposense/config.json.
- Please use the exact partial name from here as the display name.
- If you add
@@authorannotations, please follow the guidelines below:
Adding @@author tags indicate authorship
-
Mark your code with a
//@@author {yourGithubUsername}. Note the double@.
The//@@authortag should indicates the beginning of the code you wrote. The code up to the next//@@authortag or the end of the file (whichever comes first) will be considered as was written by that author. Here is a sample code file://@@author johndoe method 1 ... method 2 ... //@@author sarahkhoo method 3 ... //@@author johndoe method 4 ... -
If you don't know who wrote the code segment below yours, you may put an empty
//@@author(i.e. no GitHub username) to indicate the end of the code segment you wrote. The author of code below yours can add the GitHub username to the empty tag later. Here is a sample code with an emptyauthortag:method 0 ... //@@author johndoe method 1 ... method 2 ... //@@author method 3 ... method 4 ... -
The author tag syntax varies based on file type e.g. for java, css, fxml. Use the corresponding comment syntax for non-Java files.
Here is an example code from an xml/fxml file.<!-- @@author sereneWong --> <textbox> <label>...</label> <input>...</input> </textbox> ... -
Do not put the
//@@authorinside java header comments.
👎/** * Returns true if ... * @@author johndoe */👍
//@@author johndoe
/**
  * Returns true if ...
  */
What to and what not to annotate
-
Annotate both functional and test code There is no need to annotate documentation files.
-
Annotate only significant size code blocks that can be reviewed on its own e.g., a class, a sequence of methods, a method.
Claiming credit for code blocks smaller than a method is discouraged but allowed. If you do, do it sparingly and only claim meaningful blocks of code such as a block of statements, a loop, or an if-else statement.- If an enhancement required you to do tiny changes in many places, there is no need to annotate all those tiny changes; you can describe those changes in the Project Portfolio page instead.
- If a code block was touched by more than one person, either let the person who wrote most of it (e.g. more than 80%) take credit for the entire block, or leave it as 'unclaimed' (i.e., no author tags).
- Related to the above point, if you claim a code block as your own, more than 80% of the code in that block should have been written by yourself. For example, no more than 20% of it can be code you reused from somewhere.
- GitHub has a blame feature and a history feature that can help you determine who wrote a piece of code.
-
Do not try to boost the quantity of your contribution using unethical means such as duplicating the same code in multiple places. In particular, do not copy-paste test cases to create redundant tests. Even repetitive code blocks within test methods should be extracted out as utility methods to reduce code duplication. Individual members are responsible for making sure code attributed to them are correct. If you notice a team member claiming credit for code that he/she did not write or use other questionable tactics, you can email us (after the final submission) to let us know.
-
If you wrote a significant amount of code that was not used in the final product,
- Create a folder called
{project root}/unused - Move unused files (or copies of files containing unused code) to that folder
- use
//@@author {yourGithubUsername}-unusedto mark unused code in those files (note the suffixunused) e.g.
//@@author johndoe-unused
method 1 ...
method 2 ...
Please put a comment in the code to explain why it was not used.
- Create a folder called
-
If you reused code from elsewhere, mark such code as
//@@author {yourGithubUsername}-reused(note the suffixreused) e.g.//@@author johndoe-reused method 1 ... method 2 ... -
You can use empty
@@authortags to mark code as not yours when RepoSense attribute the to you incorrectly.-
Code generated by the IDE/framework, should not be annotated as your own.
-
Code you modified in minor ways e.g. adding a parameter. These should not be claimed as yours but you can mention these additional contributions in the Project Portfolio page if you want to claim credit for them.
-
- After you are satisfied with the new results (i.e., results produced by running RepoSense locally), push the
config.jsonfile you added and/or the annotated code to your repo. We'll use that information the next time we run RepoSense (we run it at least once a week). - If you choose to annotate code, minimize annotating code chunks smaller than a method. We do not grade code snippets too small to be read meaningfully.
- If you encounter any problem when doing the above or if you have questions, please post in the forum.
We recommend you ensure your code is RepoSense-compatible by v1.3
2 Set up the project in your computer
- Fork https://github.com/nus-cs2103-AY1920S2/duke.
- Enable the issue tracker of your fork (Go to
Settingsof your fork, scroll to theFeaturessection, and tick theIssuescheckbox). Reason: our bots will be posting your weekly progress reports on the issue tracker of your fork.
If the issue tracker is enabled, you should be able to visit the following URLhttps://github.com/{your_user_name}/duke/issuese.g.,https://github.com/johnDoe/duke/issues - Clone the fork onto your computer.
- Set up the project in your IDE as explained in the README file.
If you are somewhat familiar with build tools such as Gradle, you are free to go ahead and start using Gradle from the beginning by following the Gradle tutorial.
3 Implement increments while committing code frequently
Implement the following
- Commit code at important points. Minimally, commit after completing each increment.
- After completing each increment,
git tagthe commit with the exact increment ID e.g.,Level-2,A-TextUiTestinggit pushthe code to your fork ( git doesn't push tags unless you specifically ask it to)
We discourage you from doing project tasks allocated to future weeks. Reasons:
- In order to help you gain
fluency (and also to better simulate real projects), we want the project work to bespaced and spread over a longer period, rather than to be done as a short burst. Reminder: as per iP grading criteria, some increments need to to be done in each week for you to get full marks. - As a further incentive to not jump ahead, we have left some future project requirements unspecified, and we might change some requirements along the way too.
Level-1: Greet, Echo, Exit
Level 1. Greet, Echo, Exit
In this initial skeletal version of Duke, it starts by greeting the user, simply echos commands entered by the user, and exits when the user types bye.
Example:
    ____________________________________________________________
     Hello! I'm Duke
     What can I do for you?
    ____________________________________________________________

list
    ____________________________________________________________
     list
    ____________________________________________________________

blah
    ____________________________________________________________
     blah
    ____________________________________________________________

bye
    ____________________________________________________________
     Bye. Hope to see you again soon!
    ____________________________________________________________
- The indentation and horizontal lines are optional.
Level-2: Add, List
Level 2. Add, List
Add the ability to store whatever text entered by the user and display them back to the user when requested.
Example:
    ____________________________________________________________
     Hello! I'm Duke
     What can I do for you?
    ____________________________________________________________

read book
    ____________________________________________________________
     added: read book
    ____________________________________________________________

return book
    ____________________________________________________________
     added: return book
    ____________________________________________________________

list
    ____________________________________________________________
     1. read book
     2. return book
    ____________________________________________________________
bye
    ____________________________________________________________
     Bye. Hope to see you again soon!
    ____________________________________________________________
- There is no need to save the data to the hard disk.
- Assume there will be no more than 100 tasks. If you wish, you may use a fixed size array (e.g.,
String[100]) to store the items.
Level-3: Mark as Done
Level 3. Mark as Done
Add the ability to mark tasks as done.
list
    ____________________________________________________________
     Here are the tasks in your list:
     1.[✓] read book
     2.[✗] return book
     3.[✗] buy bread
    ____________________________________________________________

done 2
    ____________________________________________________________
     Nice! I've marked this task as done:
       [✓] return book
    ____________________________________________________________
When implementing this feature, you are also recommended to implement the following extension as collections classes
(e.g.,
ArrayList) have methods to easily delete an item at a specified location:
While it is possible to represent a task list as a multi-dimensional array containing
Task class to represent tasks.
public class Task {
    protected String description;
    protected boolean isDone;

    public Task(String description) {
        this.description = description;
        this.isDone = false;
    }

    public String getStatusIcon() {
        return (isDone ? "\u2713" : "\u2718"); //return tick or X symbols
    }

    //...
}
Task t = new Taks("read book");
t.markAsDone()
Level-4: ToDo, Event, Deadline
Level 4. ToDos, Events, Deadlines
Add support for tracking three types of tasks:
- ToDos: tasks without any date/time attached to it e.g., visit new theme park
- Deadlines: tasks that need to be done before a specific date/time e.g., submit report by 11/10/2019 5pm
- Events: tasks that start at a specific time and ends at a specific time e.g., team project meeting on 2/10/2019 2-4pm
Example:
todo borrow book
    ____________________________________________________________
     Got it. I've added this task:
       [T][✗] borrow book
     Now you have 5 tasks in the list.
    ____________________________________________________________

list
    ____________________________________________________________
     Here are the tasks in your list:
     1.[T][✓] read book
     2.[D][✗] return book (by: June 6th)
     3.[E][✗] project meeting (at: Aug 6th 2-4pm)
     4.[T][✓] join sports club
     5.[T][✗] borrow book
    ____________________________________________________________

deadline return book /by Sunday
    ____________________________________________________________
     Got it. I've added this task:
       [D][✗] return book (by: Sunday)
     Now you have 6 tasks in the list.
    ____________________________________________________________

event project meeting /at Mon 2-4pm
    ____________________________________________________________
     Got it. I've added this task:
       [E][✗] project meeting (at: Mon 2-4pm)
     Now you have 7 tasks in the list.
    ____________________________________________________________
At this point, dates/times can be treated as strings; there is no need to convert them to actual dates/times.
Example:
deadline do homework /by no idea :-p
    ____________________________________________________________
     Got it. I've added this task:
       [D][✗] do homework (by: no idea :-p)
     Now you have 6 tasks in the list.
    ____________________________________________________________
When implementing this feature, you are also recommended to implement the following extension as collections classes
(e.g.,
ArrayList) have methods to easily delete an item at a specified location:
As there are multiple types of tasks that have some similarity between them, you can implement classes Todo, Deadline and Event classes to inherit from a Task class.
Furthermore, use polymorphism to store all tasks in a data structure containing Task objects e.g., Task[100].
public class Deadline extends Task {

    protected String by;

    public Deadline(String description, String by) {
        super(description);
        this.by = by;
    }

    @Override
    public String toString() {
        return "[D]" + super.toString() + " (by: " + by + ")";
    }
}
Task[] tasks = new Task[100];
task[0] = new Deadline("return book", "Monday");
Level-5: Handle Errors
Level 5. Handle Errors
Teach Duke to deal with errors such as incorrect inputs entered by the user.
Example:
todo
    ____________________________________________________________
     ☹ OOPS!!! The description of a todo cannot be empty.
    ____________________________________________________________

blah
    ____________________________________________________________
     ☹ OOPS!!! I'm sorry, but I don't know what that means :-(
    ____________________________________________________________
When implementing this feature, you are also recommended to implement the following extension as collections classes
(e.g.,
ArrayList) have methods to easily delete an item at a specified location:
- Minimal: handle at least the two types of errors shown in the example above.
- Stretch goal: handle all possible errors in the current version. As you evolve Duke, continue to handle errors related to the new features added.
Level-6: Delete
Level 6. Delete
Add support for deleting tasks from the list.
Example:
list
    ____________________________________________________________
     Here are the tasks in your list:
     1.[T][✓] read book
     2.[D][✓] return book (by: June 6th)
     3.[E][✗] project meeting (at: Aug 6th 2-4pm)
     4.[T][✓] join sports club
     5.[T][✗] borrow book
    ____________________________________________________________

delete 3
    ____________________________________________________________
     Noted. I've removed this task:
       [E][✗] project meeting (at: Aug 6th 2-4pm)
     Now you have 4 tasks in the list.
    ____________________________________________________________
When implementing this feature, you are also recommended to implement the following extension as collections classes
(e.g.,
ArrayList) have methods to easily delete an item at a specified location: