This site is not ready yet! The updated version will be available soon.
CS2103/T 2020 Jan-Apr
  • Full Timeline
  • Week 1 [Aug 12]
  • Week 2 [Aug 19]
  • Week 3 [Aug 26]
  • Week 4 [Sep 2]
  • Week 5 [Sep 9]
  • Week 6 [Sep 16]
  • Week 7 [Sep 30]
  • Week 8 [Oct 7]
  • Week 9 [Oct 14]
  • Week 10 [Oct 21]
  • Week 11 [Oct 28]
  • Week 12 [Nov 4]
  • Week 13 [Nov 11]
  • Textbook
  • Admin Info
  • Report Bugs
  • Forum
  • Instructors
  • Announcements
  • File Submissions
  • Tutorial Schedule
  • Java Coding Standard
  • Participation Marks List

  •  Individual Project (iP):
  • Individual Project Info
  • Duke Upstream Repo
  • iP Code Dashboard
  • iP Showcase

  •  Team Project (tP):
  • Team Project Info
  • Team IDs
  • Addressbook-level3
  • Addressbook-level 1,2,4
  • tP Code Dashboard
  • tP Showcase
  • Week 1 [Aug 12] - Admin Info

    Admin info relevant to the week's will appear in this tab.

    1. Submit pre-lecture quiz by week 2 Monday 2359
    2. Set up the tools before the lecture
    3. Submit the pre-module survey by Friday 2359
    4. Learn about the module
    5. Attend the lecture

    1 Submit pre-lecture quiz by week 2 Monday 2359

    • Read prerequisite   Topics  allocated for week 1. Submit Lecture 1 - Pre-Lecture Quiz (on LumiNUS) to test your knowledge of those topics.

    2 Set up the tools before the lecture

    • Follow the Preparation instructions of the following tools.

    Relevant: [Admin Programming Language ]

    The main language used in this module is Java. You should use Java for all programming activities, the project, and exam answers.

    The module doesn’t “teach” Java. We assume you already know Java basics. We expect you to learn on your own any Java constructs not covered in your previous modules.

    Java coding standard

    This module follows the this Java coding standard.

    In the project you are required to follow basic and intermediate guidelines (those marked as ⭐️ and ⭐️⭐️). In other programming activities in the module, we recommend (but not require) you to follow the coding standard.

    Preparation:

    We require you to use Java 11 (the Oracle version or the OpenJDK version) for all module work. It is your duty to ensure the code you write (and executables you produce) are compatible with that version of Java. Any incompatibilities will be considered as bugs.

    Relevant: [Admin Tools - GitHub ]

    Tool Used: GitHub (for Code Hosting)

    You are required to use GitHub as the hosting and collaboration platform of your project (i.e., to hold the Code repository, Issue Tracker, etc.).

    Preparation:

    Create a GitHub account (if you don't have one yet), as explained in the panel below.

    Relevant: [Admin Appendix E - GitHub: Creating an Account ]

    Create a personal GitHub account if you don't have one yet.

    1. You are advised to choose a sensible GitHub username as you are likely to use it for years to come in professional contexts.

    2. Strongly recommended: Complete your GitHub profile. In particular,

      • Specify your full name.
      • Upload a profile photo that matches our requirements.

      The GitHub profile is useful for the tutors and classmates to identify you. If you are reluctant to share your info in your long-term GitHub account, you can remove those details after the module is over or create a separate GitHub account just for the module.

    3. You are discouraged from changing your GitHub username during the semester/exam/grading period as it can cause our auto-grading scripts to miss your GitHub activities. If you do change your GitHub username during that period, please let us know immediately.

    The purpose of the profile photo is for the teaching team to identify you. Therefore, choose a recent individual photo showing your face clearly (i.e., not too small) -- somewhat similar to a passport photo. Some examples can be seen in the 'Teaching team' page. Given below are some examples of good and bad profile photos.

    If you are uncomfortable posting your photo due to security reasons, you can post a lower resolution image so that it is hard for someone to misuse that image for fraudulent purposes. If you are concerned about privacy, you may use a placeholder image in place of the photo in module-related documents that are publicly visible.

    More info: See Appendix E - Using GitHub.

    Relevant: [Admin Tools - RCS ]

    Tool Used: Git (for Revision Control)

    You are required to use Git. Other revision control software are not allowed. The recommended GUI client for Git is SourceTree, but you may use any other, or none.

    Preparation:

    Install Git and a Git GUI client on your computer.
    SourceTree comes with bundled with Git i.e., if you install SourceTree, you get both Git and a GUI client in one shot.

    Set Git user.name: We use various tools to analyze your code. For us to be able to identify your commits, we encourage you to set your Git user.name in all computers you use to a sensible string that uniquely identifies you. For example, you can to GitHub username or your full name as your Git username. If this user name is not set properly or if you use multiple user names for Git, our tools might miss some of your work and as a result you might not get credit for some of your work.

    After installing Git in a computer, you can set the Git username as follows:

    1. Open a command window that can run Git commands (e.g., Git bash window)
    2. Run the command git config --global user.name YOUR_GITHUB_USERNAME (omit the --global flag to limit the setting to the current repo repo)
      e.g., git config --global user.name JohnDoe

    More info about setting Git username is here.

    Relevant: [Admin Tools - IDE ]

    Tool Used: Intellij IDE

    You are recommended to use Intellij IDEA for module-related programming work. While the use of Intellij is not compulsory, note that module materials are optimized for Intellij. Use other IDEs at your own risk.

    Preparation:

    • Install the IDE in your computer. You may use the Intellij community edition (free) or the ultimate edition (free for students).
    • If you have an older version of the IDE, we recommend updating to the latest version (i.e., 2019 edition).

    3 Submit the pre-module survey by Friday 2359

    • Submit the pre-module survey (compulsory)
      Pre-Module Survey will be available on LumiNUS Week 1 Monday - Friday 2359. We need all of you to submit it because it tells us some important information about you, especially your GitHub username.

    4 Learn about the module

    • Read the following admin info about the module.

    Using this Website Weekly Schedule


    Module Expectations

    Prior Knowledge: Java and OOP

    This module requires you to write Java code almost every week, starting from the very first week. If your Java skills are rusty, do brush up your Java programming skills.

    In particular, you may want to have a look at the new Java 8 features such as streams, lambdas, Optionals, that may not have been covered in previous Java modules.

    CS2103 students: This module assumes a reasonable prior knowledge of Java and OOP because most students taking this module have taken two Java modules before. If you are totally new to Java, you may be better off switching to CS2113 (Software Engineering & Object-Oriented Programming) instead.

    Workload

    Given 60% of this module is based on CA, it can appear to be heavy. However, it is not expected that you will spend more time on this module than its peer modules (e.g., if this module is core for you, it should not take more time than other level 2 core modules in your program).

    • Note that the module contains more things than a typical students can do, in order to provide enough things for even the strongest students to learn as much as they wish to.
    • This means it is perfectly OK if you don't have time to learn everything the module offers. Control your workload based on time you spend for the module in a week e.g., 1-1.5 days per week.
    • We have provided a star rating system to guide you when prioritizing which things to do.

    Star Rating System

    We use a star rating system indicate the importance of module components. Start with things that are rated one-star and progress to things with more stars. Things rated four stars are optional.

    Star ratings for topics (and textbook sections):

    • One-star topics are essential to keep up with the module. We recommend you to learn these topics if you want to pass the module (i.e. up to a C grade).

    • Two-stars topics can get you up to a B+.

    • Three-stars topics can get you up to an A.

    • Four-stars topics can push you beyond the limits of the module, and help you get into a level above those who merely limit themselves to the topics of the module. They are not examinable.

    • Topics marked with two icons e.g., : , : , : , : are relevant topics you are expected to have learned in prerequisite modules. They are given for reference, but are examinable. The number of stars indicates the progression of topics, similar to the star rating system above i.e., one-star prerequisite topics are the most basic and the most important. four-star pre-requisite topics can be ignored without affecting CAP.

    Star ratings for other things e.g., admin info sections:

    • The module uses a similar star rating system to indicate the importance of other info in this website. i.e., information rated as one-star are the most essential. Info rated four stars are non-essential and can be ignored without affecting your ability to follow the module.

    Using this Website Weekly Schedule

    The Schedule page is your main source of information for CS2103/T. You will need to refer to it weekly. For an overview of the full schedule, refer to the Full Timeline page.

    More details for the upcoming weeks will be added as the weeks progress. In general, information given for more than 1 week into the future should be treated as tentative.

    Browser Compatibility

    Most of this will work on most mainstream Browsers, but embedded slides are best viewed using Chrome.

    Information Layers

    This book tries to layer information so that readers can decide to omit less important layers if they wish to.

    More important information are in bold or highlighted while less important information are dimmed or in collapsed panels such as the below.

    Less important info

    Less important info

    Less important info

    Tabs indicate alternative formats of the same content (e.g. video vs text). You can choose the one you like and ignore the other tabs.

    Some textual description of X

    Video describing X

    Dotted underlines indicate tool tips (activated by hovering over it) and dashed underlines indicate modal windows (activated by clicking) containing additional information.

    Additional information
    Additional information

    This website uses a star rating system to indicate the priority level of contents.

    Relevant: [Admin Module Expectations → Star Rating System ]

    Star Rating System

    We use a star rating system indicate the importance of module components. Start with things that are rated one-star and progress to things with more stars. Things rated four stars are optional.

    Star ratings for topics (and textbook sections):

    • One-star topics are essential to keep up with the module. We recommend you to learn these topics if you want to pass the module (i.e. up to a C grade).

    • Two-stars topics can get you up to a B+.

    • Three-stars topics can get you up to an A.

    • Four-stars topics can push you beyond the limits of the module, and help you get into a level above those who merely limit themselves to the topics of the module. They are not examinable.

    • Topics marked with two icons e.g., : , : , : , : are relevant topics you are expected to have learned in prerequisite modules. They are given for reference, but are examinable. The number of stars indicates the progression of topics, similar to the star rating system above i.e., one-star prerequisite topics are the most basic and the most important. four-star pre-requisite topics can be ignored without affecting CAP.

    Star ratings for other things e.g., admin info sections:

    • The module uses a similar star rating system to indicate the importance of other info in this website. i.e., information rated as one-star are the most essential. Info rated four stars are non-essential and can be ignored without affecting your ability to follow the module.

    Conventions Used

    Shorthand Headings

    Meaning of some shortened headings:

    • What : the meaning of the concept in concern

    • Why : the motivation behind the concept in concern

    • How : the usage of the concept in concern

    • When : the pros and cons of the concept in concern, when to use the concept

    Boxed-Text Styles

    additional info warning positive message important message an error to avoid tip definition

    Meaning of Icons

    extra : tangential info, can be ignored if not interested
    : direct link to the LO. Ctrl+Click to open the LO in new window/tab.
    : learning outcomes
    : prerequisite learning outcome
    : examples
    : resources
    : exercises
    : printable version
    : preview/more info
    : video
    >_ : a command to be run in a terminal
    : textual description
    : slides
    : output produced by running code
    question without answer
    question with answer

    : tasks to do
    : lecture
    : tutorial
    : evidence you can use to prove you have achieved a learning outcome
    ⏰ : deadline

    Searching for keywords

    Use the search box in the top navigation bar to search for keywords in the website pages. If you cannot find the content related to a keyword, let us know by posting in the forum so that we can add the missing keyword to our search index.

    Saving as PDF Files

    1. Use Chrome to load the page you want to save as pdf.

    2. Click on the Print option in Chrome’s menu.

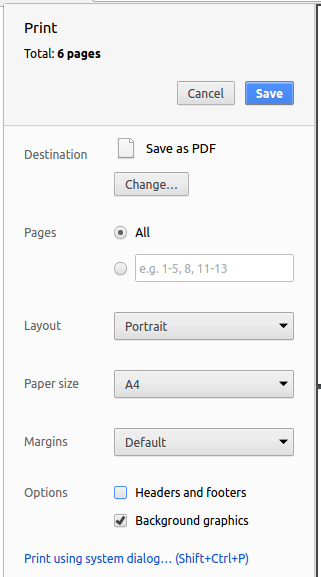
    3. Set the destination to Save as PDF, then click Save to save a copy of the file in PDF format. For best results, use the settings indicated in the screenshot below.

    Printing Textbook Content

    Printer-friendly version (indicated by icon) have been provided for each chapter and the whole book. You can use them for saving as pdf files or printing.

    Making this Website Better

    This website was generated using the MarkBind software developed at NUS. We welcome bug reports, suggestions, and contributions, to be submitted at the website issue tracker.

    [Friday (previous week)]

    • Attend the lecture to,
      • see a recap of the preceding week's topics
      • get an introduction to the current week's topics
      • submit the in-lecture quiz

    Relevant: [Admin Lectures ]

    Timing/venue:

    Semester Module Venue Time
    Semester 1 (Aug-Nov) CS2103 LT19 1200-1400
    Semester 1 (Aug-Nov) CS2103T ICube Auditorium 1600-1800
    Semester 2 (Jan-April) CS2103/T ICube Auditorium 1400-1600

    Lectures start on time sharp and end around 15 minutes before official end time.

    Attendance: Attendance for the first lecture is compulsory.

    Handouts: There are no handouts. All learning materials are organized around topics, are given in Web format, can be found in the Textbook section (organized by topics), and are also embedded in from the Schedule page (organized by order of coverage).

    Slides: Our lecture slides are not suited for printing or to be used as a reference during the lecture/exams. They are only an aid for lecture delivery. Slides will be uploaded to LumiNUS after the lecture.

    [Saturday (previous week) - Tutorial day]

    • Use the relevant learning resources to learn the topics.
    • Self-test your knowledge using exercises given in the learning resources.
    • Submit the post-lecture quiz
    • Do project tasks (e.g., attend weekly project meeting, finish weekly deliverables)
    • If you don't have time to learn all topics assigned to the week, use the star rating system to decide which ones to do first.

    [Tutorial Day (Wednesday - Friday)]

    • Attend the tutorial to,
      • demonstrate evidence of your learning weekly topics to the tutor
      • learn from peer demos of showing evidence of their own learning

    Relevant: [Admin Tutorials ]

    Tutorial Timetable

    Our tutorial IDs are different from LumiNUS. Format: CS2103T-W09 means a tutorial of CS2103T module, held on Wednesday at 0900, and so on.

    Module Venue Time Tutorial ID
    in LumiNUS

    (don't use this!)
    Our Tutorial ID
    (use this!)
    Tutors
    CS2103T COM1-0210 (SR 10) Wed 11:00 G01 CS2103T-W11 Damith, Yuan Chuan
    CS2103T COM1-0210 (SR 10) Wed 12:00 G02 CS2103T-W12 Joanne, Andrew
    CS2103T COM1-0210 (SR 10) Wed 13:00 G03 CS2103T-W13 Jacob, Benjamin
    CS2103T COM1-0210 (SR 10) Thu 09:00 G11 CS2103T-T09 Jeffry, Yuan Chuan
    CS2103T COM1-0210 (SR 10) Thu 10:00 G05 CS2103T-T10 Jeffry, Tejas
     CS2103  COM1-B103 Thu 11:00 08 CS2103-T11 Damith, Brian
    CS2103T COM1-0210 (SR 10) Thu 11:00 G06 CS2103T-T11 James, Jeff
    CS2103T COM1-0210 (SR 10) Thu 12:00 G04 CS2103T-T12 Jun Rong, Brian
    CS2103T COM1-0210 (SR 10) Thu 13:00 G10 CS2103T-T13 Xiaowen, Yuan Chuan
     CS2103  COM1-0210 (SR 10) Thu 14:00 02 CS2103-T14 Gilbert, Yuan Chuan
     CS2103  COM1-0210 (SR 10) Thu 16:00 04 CS2103-T16 Kyler, ZhiHui
    CS2103T COM1-B103 COM1-0210 (SR 10) Thu 17:00 G13 CS2103T-T17 Jun Rong
     CS2103  COM1-0210 (SR 10) Fri 09:00 06 CS2103-F09 Jonathan, Keith
     CS2103  COM1-0210 (SR 10) Fri 10:00 07 CS2103-F10 Jonathan, Keith
    CS2103T COM1-0210 (SR 10) Fri 11:00 G12 CS2103T-F11 Jia Hao, Yuan Chuan
    CS2103T COM1-0210 (SR 10) Fri 12:00 G08 CS2103T-F12 Ayush, Yash
    CS2103T COM1-0210 (SR 10) Fri 13:00 G07 CS2103T-F13 LongBin, Yash
    CS2103T COM1-0210 (SR 10) Fri 14:00 G09 CS2103T-F14 Alfred, Yash

    What happens during the tutorial:

    • A tutorial group is handled by two tutors. Each tutor will work with two teams.
    • The tutor will direct students to share/discuss evidence of learning the weekly topics.
    • If some students have met with difficulties while learning a topic, the tutor can direct those students to get help from those who have learned the topic. The number of topics that can be covered in the tutorial session depends on how well-prepared you are.
    • The tutor will observe, and give feedback on how well you are learning required topics.
    • Please bring your laptop to tutorials. Often, you will need it for tutorial tasks.

    Relevant: [Admin Appendix C(FAQ): What if I don't carry around a laptop? ]

    What if I don’t carry around a laptop?

    If you do not have a laptop or prefer not to bring the laptop, it is up to you to show your work to the tutor in some way (e.g. by connecting to your home PC remotely), without requiring extra time/effort from the tutor or team members.

    Reason: As you enjoy the benefits of not bring the laptop; you (not others) should bear the cost too.


    The role of our tutors is different from tutors in other modules.

    • No direct tech help: Tutors are prohibited from giving direct technical help, other than to give you some general direction to finding a solution. Rationale: We want you to learn the vital survival skill of troubleshooting technical problems.

    Relevant: [Admin Appendix D: How to get Help in CS2103/T ]

    This guide is mostly about getting tech help, but it also applies to getting clarifications on module topics too. e.g. what is the difference between refactoring and rewriting?


    We want to move you away from 'hand holding' and make you learn how to solve problems on your own. This is a vital survival skill in the industry and it needs practice.

    Whether it is a technical problem (e.g. error when using the IDE) or a doubt about a concept (e.g. what is the difference between scripted testing and exploratory testing?)  the teaching team is happy to work with you when you look for a solution/answer, but we do not do it for you. We discourage unconditional direct help from tutors because we want you to learn to help yourself. Yes, we believe in ‘tough love’😝.

    The question you should always ask yourself is, 'how do I solve this problem if the lecturer/tutors are not around to help me?'


    What not to do:

    • Send a help request to an instructor: When faced with a technical problem or a doubt about a concept, don't fire off an email lecturer/tutor immediately, unless it is something only the lecturer/tutor is supposed to know.

    What to do:

    • Check what is given: Check if the problem/concept has been discussed in the lectures, textbook, or the list of resources given to you. Yes, it is easier for you to write an email to the tutor/lecturer instead, but that shouldn't be your default behavior. We know that sometimes it is difficult to find stuff in the resources we have provided. But you should try first.

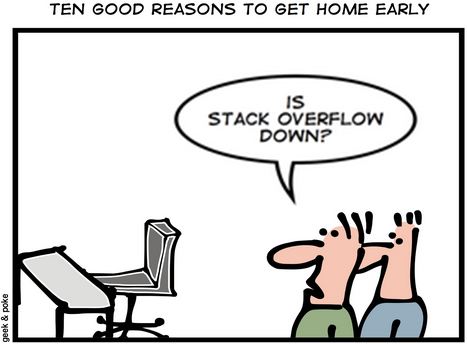
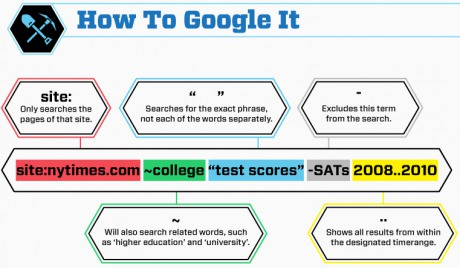
    • Search: It is very likely the answer already exists somewhere in the cyberspace. Almost every programming-related question has been answered in places like stackoverflow. Don't give an opportunity for someone to ask you to STFW.
      Pay attention to the error message you encounter. Sometimes it also contains hints as to how to fix the problem. Even if not, a web search on the error message is a good starting point.  

    • Ask peers:

      Ask your team members.

      Ask classmates using the module forum. Even if you figured out one way to solve a problem, discussing it on a public forum might lead you to better ways of solving it, and will help other classmates who are facing similar problems too. If you are really shy to ask questions in the forum, you may use this form to submit your question anonymously which we will then post in the forum.


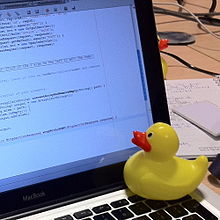
      Rubber duck debugging is an informal term used in software engineering to refer to a method of debugging code. The name is a reference to a story in the book The Pragmatic Programmer in which a programmer would carry around a rubber duck and debug his code by forcing himself to explain it, line-by-line, to the duck.

      [for more, see wikipedia entry]

    • Ask the world using programming forums such as stackoverflow.

      Here are some tips for posting help request:

      • PLEASE search for existing answers before you post your question in those public forums; You don't want to appear as a 'clueless' or 'too lazy to do your research' person in a public forum.

      • Learn to isolate the problem. "My code doesn't work" isn't going to help even if you post the whole code online. Others don't have time to go through all of your code. Isolate the part that doesn't work and strip it down to the bare minimum that is enough reproduce the error. Sometimes, this process actually helps you to figure out the problem yourself. If not, at least it increases the chance of someone else being able to help you.

        How to isolate problematic code? Delete code (one bit at a time) that is confirmed as not related to the problem. Do that until you can still reproduce the problem with the least amount of code remaining.

      • Generalize the problem. "How to write tasks to a text file using Java" is too specific to what you are working on. You are more likely to find help if you post a thread called (or search for) "How to write to a file using Java".

      • Explain well. Conversations via online forums take time. If you post everything that is relevant to your problem, your chances of getting an answer in the first try is higher. If others have to ask you more questions before they can help you, it will take longer. But this doesn't mean you dump too much information into the thread either.

        Know what these stand for: RTFM, STFW, GIYF

    • Raise your question during a tutorial. Some questions can be discussed with the tutor and tutorial-mates. What kind of questions are suitable to discuss with the tutor? Consider these two questions you might want to ask a tutor:
      • Good This is how I understood/applied coupling. Is that correct? - Such questions are welcome. Reason:This question shows you have put in some effort to learn the topic and seeking further clarification from the tutor.
      • Bad What is coupling? - Such questions are discouraged. Reason: This question implies you haven’t done what you could to learn the topic in concern.
    • Talk to the lecturer before or after the lecture. The lecturer will be at the lecture venue from 30 minutes before the start of the lecture.

    • Request our help: Failing all above, you can always request for help by emailing the lecturer.

    Resources


    • No ‘teaching’: Tutors are prohibited from “teaching” concepts that are covered in lectures or other learning resources given to you as self-learning is a vital part of the module. For example, the tutor will not do a mini-lecture at the start of the tutorial. Of course tutors can help you clarify doubts under the right circumstances.

    Relevant: [Admin Appendix D (extract): Questions suitable for tutor ]

    • Raise your question during a tutorial. Some questions can be discussed with the tutor and tutorial-mates. What kind of questions are suitable to discuss with the tutor? Consider these two questions you might want to ask a tutor:
      • Good This is how I understood/applied coupling. Is that correct? - Such questions are welcome. Reason:This question shows you have put in some effort to learn the topic and seeking further clarification from the tutor.
      • Bad What is coupling? - Such questions are discouraged. Reason: This question implies you haven’t done what you could to learn the topic in concern.


    • No leading from the front: Tutors are not expected to lead your project effort. They will not tell you how to do project tasks or when to do project tasks. You have to figure those out yourselves. But tutors will give you feedback on how you are doing (or have done) project tasks so that you can improve further.

    Timing/venue:

    • Please refer to the Schedule page for further details on each tutorial.
    • You are expected to arrive on time. Punctuality is considered for participation marks.
    • You may leave the class 15 minutes before the hour if you have another class right after. There is no need to wait till the tutor dismisses you. However, inform the tutor (as a courtesy) before leaving if you leave before the class is dismissed.
    • Please make sure you vacate the table 5 minutes before the hour so that the next group can start on time.
    • In the past, many students have requested to increase the tutorial duration because a mere hour is barely enough to get through all the tutorial tasks. Increasing the tutorial time is not possible due to lack of venues and tutors. Instead, let's try to make the best of the one hour available by coming well prepared and starting on time.

    Grading:

    Tutorials are not graded. However, your conduct will be reviewed by team members and the tutor which will determine your participation marks.

    [Exchange students only] Registering for tutorials:

    • Exchange students need to use the ORATUT system to register for the tutorials. You must have received the instructions from UG office on how/when to go about the registration process. If not, please talk to UG office. When we can see your appeal on ORATUT, we can allocate you to the tutorial slot.

    A balanced, iterative, and brown-field introduction to Software Engineering...

    CS2103/T is an introductory Software Engineering module. It has a 50-50 balance of basic SE theory knowledge and practical skills that you need to gain before industry internships or higher-level project modules. The module follows an iterative approach to covering topics. It is also one of the rare SE modules that includes a brown-field project, in addition to a green-field project.

    • On the theory side, this module is supported by a customized online textbook Software Engineering for Self-Directed Learners, integrated into this module website.

    • The practice side, you will first ramp up your technical skills by doing a small individual project (green-field) in which you will develop a personal assistant chatbot called Duke. Then, you will move to a team project (brown-field) in which you will take over an existing project AddressBook-Level3 (AB3) -- a relatively small yet non-trivial (6 KLoC) generic product -- and enhance it into a better product or evolve it into a different product.

    Given below is a summary of what the module covers and does not cover.

    Topic Covered Not covered
    Java Used heavily, but not taught syntax (reason: expected prerequisite knowledge)
    OOP Used in a non-trivial project, intermediate OOP principles basics (reason: expected prerequisite knowledge)
    SE tools/practices those typically used in a mature, high-rigor SE project those specific to start-ups
    Modeling Some UML notations (sufficient to be able to describe SE artifacts using models, such as seen in this Developer Guide of AB3) intensive upfront design modeling
    Requirements Some lightweight techniques to gather and document project requirements rapid prototyping, heavy UI design, designing a product from scratch
    Documentation Documentation targeting end users (example) as well as those targeting developers (example) Marketing materials
    Project Management Iterative delivery of a product, working collaboratively with team members, on-site as well as remotely Setting up project infrastructure from scratch
    Testing basic developer testing and user testing testing for non-functional aspects
    Applications domains Cross-platform desktop applications Web programming, Mobile programming, Database programming

    + Other admin info you may want to read this week:

    Admin Appendix C (FAQs) → Where is everything?

    Where is everything?

    The Schedule page presents all you need to know in chronological order while the other pages have some of the same content organized by topic.

    The Schedule page is the one page you need to refer weekly. Although there is a lot of content in the Admin Info page and the Textbook page -- which you are welcome to read in those respective pages -- the same content is also embedded in the relevant weeks of the Schedule page. Embedded extracts usually appear in expandable panels and can be identified by the symbol in the panel title.

    Admin tP: Forming Teams


    [Picture: The team that was at the top of early Google]

    When to form teams

    • CS2103T: Your team will be formed by the CS2101 side.
    • CS2103: Your team will be formed at the start of the week 3 tutorial. Please try to arrive on time for that tutorial; if you are not there at the team forming time and others in the class are unaware which team you wanted to be in, we'll have to put you into a team randomly.

    Team size

    • The default team size is five.

    Team composition

    • We allow some freedom in choosing team members, subject to these constraints:
      • All team members should be in the same tutorial. Delay forming teams until your place in a tutorial is confirmed. We do not allow changing tutorials to team up with your preferred team mates.
      • Teams of single nationality are not allowed unless the only language common among all team members is English. e.g. an all-Singaporean team that include both Chinese and Malay students. Rationale: to train you to work in multicultural teams, to ensure that English is used for all project communication
      • No more than one exchange students per team Rationale: to increase interaction between exchange students and NUS students.
      • Same gender teams are discouraged but allowed. Rationale: to train you for mixed-gender work environments.
    • We may modify teams when circumstances call for it. There is no avenue for you to object. Staying with your preferred team is not guaranteed.

    Admin Programming Language

    The main language used in this module is Java. You should use Java for all programming activities, the project, and exam answers.

    The module doesn’t “teach” Java. We assume you already know Java basics. We expect you to learn on your own any Java constructs not covered in your previous modules.

    Java coding standard

    This module follows the this Java coding standard.

    In the project you are required to follow basic and intermediate guidelines (those marked as ⭐️ and ⭐️⭐️). In other programming activities in the module, we recommend (but not require) you to follow the coding standard.

    Preparation:

    We require you to use Java 11 (the Oracle version or the OpenJDK version) for all module work. It is your duty to ensure the code you write (and executables you produce) are compatible with that version of Java. Any incompatibilities will be considered as bugs.

    Admin Textbooks

    This module is supported by a customized online textbook Software Engineering for Self-Directed Learners (CS2103 edition), integrated into this module website. While it is in a dynamic Web page format, there is a way to save the main text as pdf files. Printer-friendly versions have been provided too. In addition, a PDF version of the full textbook will be provided at the start of the semester, via LumiNUS.

    Relevant: [Admin Using this Website → Saving as PDF files ]

    Saving as PDF Files

    1. Use Chrome to load the page you want to save as pdf.

    2. Click on the Print option in Chrome’s menu.

    3. Set the destination to Save as PDF, then click Save to save a copy of the file in PDF format. For best results, use the settings indicated in the screenshot below.

    Admin Grade Breakdown

    Relevant: [Admin Participation Marks ]

    To receive full 5 marks allocated for participation, meet the criteria A, B, and C.

    A Earn at least half of weekly participation points in at least 10 weeks.

    • In-lecture quiz:
      • Answered at least 80% of the questions correctly: 2 points
      • Answered 40-80% questions correctly: 1 point
    • Post-lecture quiz:
      • Answered at least 80% of the questions correctly: 3 points
      • Answered 60-80% questions correctly: 2 points
      • Answered 40-60% questions correctly: 1 point
    • Missing compulsory administrative requirements e.g., forgot to submit peer evaluations: -2 for each miss

    As the lecture on Week N covers topics for Week N+1, the Lecture N's in-lecture and post-lecture quiz points are counted for Week N+1

    B Received good peer evaluations

    In addition, you can receive a bonus marks in the following ways. Bonus marks can be used to top up your participation marks should your marks from the above falls below 5.

    • Receiving good ratings for all 10 peer evaluations criteria: 1 mark
    • Being very helpful to classmates e.g., multiple helpful posts in forum: 1 mark

    Relevant: [Admin Peer Evaluations → Criteria ]

    Peer evaluation criteria: professional conduct

    • Professional Communication :
      • Communicates sufficiently and professionally. e.g. Does not use offensive language or excessive slang in project communications.
      • Responds to communication from team members in a timely manner (e.g. within 24 hours).
    • Punctuality: Does not cause others to waste time or slow down project progress by frequent tardiness.
    • Dependability: Promises what can be done, and delivers what was promised.
    • Effort: Puts in sufficient effort to, and tries their best to keep up with the module/project pace. Seeks help from others when necessary.
    • Quality: Does not deliver work products that seem to be below the student's competence level i.e. tries their best to make the work product as high quality as possible within her competency level.
    • Meticulousness:
      • Rarely overlooks submission requirements.
      • Rarely misses compulsory module activities such as pre-module survey.
    • Teamwork: How willing are you to act as part of a team, contribute to team-level tasks, adhere to team decisions, etc. Honors all collectively agreed-upon commitments e.g., weekly project meetings.

    Peer evaluation criteria: competency

    • Technical Competency: Able to gain competency in all the required tools and techniques.
    • Mentoring skills: Helps others when possible. Able to mentor others well.
    • Communication skills: Able to communicate (written and spoken) well. Takes initiative in discussions.

    C Tutorial attendance/participation not too low

    Low attendance/participation can affect participation marks directly (i.e., attended fewer than 7) or indirectly (i.e., it might result in low peer evaluation ratings).

    Examples:

    • Alicia earned 1/2, 3/5, 2/5, 5/5, 5/5, 5/5, 5/5, 5/5, 5/5, 5/5, 4/5, 5/5 in the first 12 weeks. As she received at least half of the points in 11 of the weeks, she gets 5 participation marks. Bonus marks are not applicable as she has full marks already.
    • Benjamin managed to get at least half of the participation points in 9 weeks only, which gives him 5-1 = 4 participation marks. But he received good peer ratings for all criteria, and hence get a bonus mark to make it 5/5.
    • Chun Ming met the participation points bar in 8 weeks only, giving him 5-2 = 3 marks. He lost 2 more marks because he received multiple negative ratings for two criteria, giving him 1/5 participation marks.

    Participation marks are available in this page.

    • The important column is the Weeks Count column. It tells you how many weeks you have met the bar for the criterion A). Your target is to hit 10 weeks.
    • Participation of a week is usually calculated based on two quizzes. For example, week 4 score is calculated based on,
      • W4-Q1: previous week's (i.e., lecture 3) in-lecture quiz
      • W4-Q2: previous week's (i.e., lecture 3) post-lecture quiz
    • Participation bar for weeks 1-3 have been simplified as follows (to account for late enrollments, LumiNUS problems etc.):
      • Week 1: submitted pre-module survey or pre-lecture quiz
      • Week 2: submitted at least one of the quizzes
      • Week 3: did reasonably in both quizzes or did well in one of the quizzes
    • Quizzes for Week 4 and thereafter are counted as explained in A above.

    If you have queries about the participation marks, please email cs2103@comp.nus.edu.sg.

    Relevant: [Admin Exams ]

    There is no midterm.

    The final exam has two parts:

    • Part 1: MCQ questions (1 hour, 20 marks)
    • Part 2: Essay questions (1 hour, 20 marks)

    Both papers will be given to you at the start but you need to answer Part 1 first (i.e. MCQ paper). It will be collected 1 hour after the exam start time (even if arrived late for the exam). You are free to start part 2 early if you finish Part 1 early.

    Given the fast pace required by the paper, the large class size, and the need to collect part 1 answer scripts in the middle of the exam, to be fair to all students, invigilators will not answer queries about the questions in the exam paper (but will answer queries related to exam administration).

    • If you have a doubt/query about a question ,or would like to make an assumption about a question, or would like to report a potential error in the exam paper, write down your doubt/query/assumption in the space provided for it at the end of the exam paper.
    • Those doubts/queries/assumptions (if justified) will be taken into account when grading.

    Final Exam: Part 1 (MCQ)

    Each MCQ question gives you a statement to evaluate.

    An example statement

    Testing is a Q&A activity

    Unless stated otherwise, the meaning of answer options are
    A: Agree. If the question has multiple statements, agree with all of them.
    B: Disagree. If the question has multiple statements, disagree with at least one of them
    C, D, E: Not used

    Number of questions: 100

    Note that you have slightly more than ½ minute for each question, which means you need to go through the questions fairly quickly.

    Questions in Part 1 are confidential. You are not allowed to reveal Part 1 content to anyone after the exam. All pages of the exam paper are to be returned at the end of the exam.

    You will be given OCR forms (i.e., bubble sheets) to indicate your answers for Part 1. As each OCR form can accommodate only 50 answers, you will be given 2 OCR forms. Indicate your student number in both OCR forms.

    To save space, we use the following notation in MCQ question. [x | y | z] means ‘x and z, but not y’

    SE is [boring | useful | fun] means SE is not boring AND SE is useful AND SE is fun.

    Consider the following statement:

    • IDEs can help with [writing | debugging | testing] code.

    The correct response for it is Disagree because IDEs can help with all three of the given options, not just writing and testing.

    Some questions will use highlighting to draw your attention to a specific part of the question. That is because those parts are highly relevant to the answer and we don’t want you to miss the relevance of that part.

    Consider the statement below:

    Technique ABC can be used to generate more test cases.

    The word can is highlighted because the decision you need to make is whether the ABC can or cannot be used to generate more test cases; the decision is not whether ABC can be used to generate more or better test cases.

    Markers such as the one given below appears at left margin of the paper to indicate where the question corresponds to a new column in the OCR form. E.g. questions 11, 21, 31, etc. (a column has 10 questions). Such markers can help you to detect if you missed a question in the previous 10 questions. You can safely ignore those markers if you are not interested in making use of that additional hint.


    Some questions have tags e.g., the question below has a tag JAVA. These tags provide additional context about the question. In the example below, the tag indicates that the code given in the question is Java code.


    The exam paper is open-book: you may bring any printed or written materials to the exam in hard copy format. However, given the fast pace required by Part 1, you will not have time left to refer notes during that part of the exam.

    Mark the OCR form as you go, rather than planning to transfer your answers to the OCR form near the end. Reason: Given there are 100 questions, it will be hard to estimate how much time you need to mass-transfer all answers to OCR forms.

    Write the answer in the exam paper as well when marking it in the OCR form. Reason: It will reduce the chance of missing a question. Furthermore, in case you missed a question, it will help you correct the OCR form quickly.

    We have tried to avoid deliberately misleading/tricky questions. If a question seems to take a very long time to figure out, you are probably over-thinking it.

    You will be given a practice exam paper to familiarize yourself with this slightly unusual exam format.

    Final Exam: Part 2 (Essay)

    Yes, you may use pencils when answering part 2.

    Relevant: [Admin Individual Project (iP) Grading ]

    To get full marks, you should achieve at least some iP deliverables in most weeks (i.e., at least in 4 out of weeks 1-7) and achieve more than 80% of all deliverables by the end.

    • Requirements marked as optional or if-applicable are not counted when calculating the percentage of deliverables.
    • When a requirement specifies a minimal version of it, simply reaching that minimal version of the requirement is enough for it to be counted for grading -- however, we recommend you to go beyond the minimal; the farther you go, the more practice you get.

    Relevant: [Admin Team Project (tP) Grading ]

    Note that project grading is not competitive (not bell curved). CS2103T projects will be assessed separately from CS2103 projects. Given below is the marking scheme.

    Total: 45 marks ( 35 individual marks + 10 team marks)

    See the sections below for details of how we assess each aspect.


    1. Project Grading: Product Design [/ 5 marks]

    Evaluates: how well your features fit together to form a cohesive product (not how many features or how big the features are) and how well does it match the target user

    Evaluated by:

    • tutors (based on product demo and user guide)
    • peers from other teams (based on peer testing and user guide)

    For reference, here are some grading instructions given to evaluators:

    Evaluate the product design based on the User Guide and the actual product behavior.

    Target user:

    • target user specified and appropriate: The target user is clearly specified, prefers typing over other modes of input, and not too general (should be narrowed to a specific user group with certain characteristics).
    • value specified and matching: The value offered by the product is clearly specified and matches the target user.
    • optimized for the target user: It feels like a fast typist can be more productive with the app, compared to an equivalent GUI app without a CLI.

    Value to the target user:

    In addition, feature flaws reported in the PE will be considered when grading this aspect.

    These will be considered feature flaws:
    The feature does not solve the stated problem of the intended user i.e., the feature is 'incomplete'
    Hard-to-test features
    Features that don't fit well with the product
    Features that are not optimized enough for fast-typists or target users


    2. Project Grading: Implementation [ 10 marks]

    2A. Code quality

    Evaluates: the quality of the code you have written yourself

    Based on: the parts of the code you claim as written by you

    Evaluation method: manual inspection by tutors + automated-analysis by a script

    For reference, here are some grading instructions given to evaluators:

    • At least some evidence of these (see here for more info)

      • logging
      • exceptions
      • assertions
      • defensive coding
    • No coding standard violations e.g. all boolean variables/methods sounds like booleans. Checkstyle can prevent only some coding standard violations; others need to be checked manually.

    • SLAP is applied at a reasonable level. Long methods or deeply-nested code are symptoms of low-SLAP.

    • No noticeable code duplications i.e. if there multiple blocks of code that vary only in minor ways, try to extract out similarities into one place, especially in test code.

    • Evidence of applying code quality guidelines covered in the module.

    2B. Effort

    Evaluates: how much value you contributed to the product

    Method: Evaluated in two steps.

    Step 1: Evaluate the effort for the entire project. This is evaluated by peers who tested your product, and tutors.

    For reference, here are some grading instructions given to evaluators:

    Quality: Compared to AB3, the quality of this product is,

    Effort: Assume the effort required to create AB3 from scratch is 10 in a scale of 0 to 30. How much effort do you estimate the team put in for this project?

    • Do not give a high value just to be nice. Your responses will be used to evaluate your effort estimation skills.

    Step 2: Evaluate how much of that effort can be attributed to you. This is evaluated by team members, and tutors.

    For reference, here are some grading instructions given to evaluators:

    Evaluate the contribution to the product by each team member.

    • Count all implementation/testing/documentation work as mentioned in that person's PPP.
    • Also look at the actual code written by the person.

    3. Project Grading: QA [ 10 marks]

    3A. Developer Testing:

    Evaluates: How well you tested your own feature

    Based on:

    1. functionality bugs in your work found by others during the PE
    2. your test code (note our expectations for automated testing)
    • There is no requirement for a minimum coverage level. Note that in a production environment you are often required to have at least 90% of the code covered by tests. In this project, it can be less. The less coverage you have, the higher the risk of regression bugs, which will cost marks if not fixed before the final submission.
    • You must write some tests so that we can evaluate your ability to write tests.
    • How much of each type of testing should you do? We expect you to decide. You learned different types of testing and what they try to achieve. Based on that, you should decide how much of each type is required. Similarly, you can decide to what extent you want to automate tests, depending on the benefits and the effort required.

    These are considered functionality bugs:
    Behavior differs from the User Guide
    A legitimate user behavior is not handled e.g. incorrect commands, extra parameters
    Behavior is not specified and differs from normal expectations e.g. error message does not match the error

    3B. System/Acceptance Testing:

    Evaluates: How well you can system-test/acceptance-test a product

    Based on: bugs you found in the Practical Exam. In addition to functionality bugs, you get credit for reporting documentation bugs and feature flaws.

    Notes on how marks are calculated based on PE product testing
    • Of 3A and 3B above, the one you do better will be given a 70% weight and the other a 30% weight so that your total score is driven by your strengths rather than weaknesses.
    • Bugs rejected by the dev team, if the rejection is approved by the teaching team, will not be affect marks of the tester or the developer.
    • The penalty/credit for a bug varies based on,
      • The severity of the bug: severity.High > severity.Medium > severity.Low > severity.VeryLow
      • The type of the bug: type.FunctionalityBug > type.DocumentationBug > type.FeatureFlaw
    • The penalty for a bug is divided equally among assignees.
    • The developers are not penalized for the duplicate bug reports they received but the testers earn credit for the duplicate bug reports they submitted as long as the duplicates are not submitted by the same tester.
    • Obvious bugs earn less credit for the tester and slightly more penalty for the developer.
    • If the team you tested has a low bug count i.e., total bugs found by all testers is low, we will fall back on other means (e.g., performance in PE dry run) to calculate your marks for system/acceptance testing.
    • Your marks for developer testing depends on the bug density rather than total bug count. Here's an example:
      • n bugs found in your feature; it is a difficult feature consisting of lot of code → 4/5 marks
      • n bugs found in your feature; it is a small feature with a small amount of code → 1/5 marks
    • You don't need to find all bugs in the product to get full marks. For example, finding half of the bugs of that product or 4 bugs, whichever the lower, could earn you full marks.
    • Excessive incorrect downgrading/rejecting/ duplicate-flagging, if deemed an unethical attempt to game the system, may be penalized.

    4. Project Grading: Documentation [ 10 marks]

    Evaluates: your contribution to project documents

    Method: Evaluated in two steps.

    Step 1: Evaluate the whole UG and DG. This is evaluated by peers who tested your product, and tutors.

    For reference, here are some instructions given to evaluators:

    UG: Compared to AB3, the quality of this UG is,

    DG: similar to UG

    Step 2: Evaluate how much of that effort can be attributed to you. This is evaluated by team members, and tutors.

    For reference, here are some grading instructions given to evaluators:

    Q: Evaluate the contribution to the UG by each team member. Note that your evaluation must correspond to RepoSense data and the claims made by the PPP of each member.

    Q: Evaluate the contribution to the DG by each team member.

    Q: Which type of these UML diagrams in the DG did you personally add (or significantly modified)?

    • Class Diagrams
    • Object Diagrams
    • Sequence Diagrams
    • Activity Diagrams

    In addition, UG and DG bugs you received in the PE will be considered for grading this component.

    These are considered UG bugs (if they hinder the reader):
    Not enough visuals e.g., screenshots/diagrams
    The visuals are not well integrated to the explanation.
    The visuals are unnecessarily repetitive e.g., same visual repeated with minor changes.
    Not enough examples e.g., sample inputs/outputs.
    The explanation is too brief or unnecessarily long.
    The information is hard to understand for the target audience. e.g., using terms the reader might not know
    The document looks messy, or not well-formatted.

    These are considered DG bugs (if they hinder the reader):

    These are considered UG bugs (if they hinder the reader):
    Not enough visuals e.g., screenshots/diagrams
    The visuals are not well integrated to the explanation.
    The visuals are unnecessarily repetitive e.g., same visual repeated with minor changes.
    Not enough examples e.g., sample inputs/outputs.
    The explanation is too brief or unnecessarily long.
    The information is hard to understand for the target audience. e.g., using terms the reader might not know
    The document looks messy, or not well-formatted.

    UML notation incorrect or not compliant with the notation covered in the module.
    Some other type of diagram used when a UML diagram would have worked just as well.
    The diagram used is not suitable for the purpose it is used.
    The diagram is too complicated.
    Excessive use of code e.g., a large chunk of code is cited when a smaller extract of would have sufficed.


    5. Project Grading: Project Management [ 5 + 5 = 10 marks]

    5A. Process:

    Evaluates: How well you did in project management related aspects of the project, as an individual and as a team

    Based on: tutor/bot observations of project milestones and GitHub data

    Milestones need to be reached the midnight before of the tutorial for it to be counted as achieved. To get a good grade for this aspect, achieve at least 60% of the recommended milestone progress.

    Other criteria:

    • Good use of GitHub milestones
    • Good use of GitHub release mechanism
    • Good version control, based on the repo
    • Reasonable attempt to use the forking workflow
    • Good task definition, assignment and tracking, based on the issue tracker
    • Good use of buffers (opposite: everything at the last minute)
    • Project done iteratively and incrementally (opposite: doing most of the work in one big burst)

    5B. Team-tasks:

    Evaluates: How much you contributed to team-tasks

    Based on: peer evaluations, tutor observations

    To earn full marks, you should have done a fair share of the team tasks. You can earn bonus marks by doing more than your fair share.

    Relevant: [Admin tP Scope → Examples of team-tasks ]

    Here is a non-exhaustive list of team-tasks:

    1. Necessary general code enhancements e.g.,
      1. Work related to renaming the product
      2. Work related to changing the product icon
      3. Morphing the product into a different product
    2. Setting up the GitHub, Travis, AppVeyor, etc.
    3. Maintaining the issue tracker
    4. Release management
    5. Updating user/developer docs that are not specific to a feature e.g. documenting the target user profile
    6. Incorporating more useful tools/libraries/frameworks into the product or the project workflow (e.g. automate more aspects of the project workflow using a GitHub plugin)

    Admin Participation Marks

    To receive full 5 marks allocated for participation, meet the criteria A, B, and C.

    A Earn at least half of weekly participation points in at least 10 weeks.

    • In-lecture quiz:
      • Answered at least 80% of the questions correctly: 2 points
      • Answered 40-80% questions correctly: 1 point
    • Post-lecture quiz:
      • Answered at least 80% of the questions correctly: 3 points
      • Answered 60-80% questions correctly: 2 points
      • Answered 40-60% questions correctly: 1 point
    • Missing compulsory administrative requirements e.g., forgot to submit peer evaluations: -2 for each miss

    As the lecture on Week N covers topics for Week N+1, the Lecture N's in-lecture and post-lecture quiz points are counted for Week N+1

    B Received good peer evaluations

    In addition, you can receive a bonus marks in the following ways. Bonus marks can be used to top up your participation marks should your marks from the above falls below 5.

    • Receiving good ratings for all 10 peer evaluations criteria: 1 mark
    • Being very helpful to classmates e.g., multiple helpful posts in forum: 1 mark

    Relevant: [Admin Peer Evaluations → Criteria ]

    Peer evaluation criteria: professional conduct

    • Professional Communication :
      • Communicates sufficiently and professionally. e.g. Does not use offensive language or excessive slang in project communications.
      • Responds to communication from team members in a timely manner (e.g. within 24 hours).
    • Punctuality: Does not cause others to waste time or slow down project progress by frequent tardiness.
    • Dependability: Promises what can be done, and delivers what was promised.
    • Effort: Puts in sufficient effort to, and tries their best to keep up with the module/project pace. Seeks help from others when necessary.
    • Quality: Does not deliver work products that seem to be below the student's competence level i.e. tries their best to make the work product as high quality as possible within her competency level.
    • Meticulousness:
      • Rarely overlooks submission requirements.
      • Rarely misses compulsory module activities such as pre-module survey.
    • Teamwork: How willing are you to act as part of a team, contribute to team-level tasks, adhere to team decisions, etc. Honors all collectively agreed-upon commitments e.g., weekly project meetings.

    Peer evaluation criteria: competency

    • Technical Competency: Able to gain competency in all the required tools and techniques.
    • Mentoring skills: Helps others when possible. Able to mentor others well.
    • Communication skills: Able to communicate (written and spoken) well. Takes initiative in discussions.

    C Tutorial attendance/participation not too low

    Low attendance/participation can affect participation marks directly (i.e., attended fewer than 7) or indirectly (i.e., it might result in low peer evaluation ratings).

    Examples:

    • Alicia earned 1/2, 3/5, 2/5, 5/5, 5/5, 5/5, 5/5, 5/5, 5/5, 5/5, 4/5, 5/5 in the first 12 weeks. As she received at least half of the points in 11 of the weeks, she gets 5 participation marks. Bonus marks are not applicable as she has full marks already.
    • Benjamin managed to get at least half of the participation points in 9 weeks only, which gives him 5-1 = 4 participation marks. But he received good peer ratings for all criteria, and hence get a bonus mark to make it 5/5.
    • Chun Ming met the participation points bar in 8 weeks only, giving him 5-2 = 3 marks. He lost 2 more marks because he received multiple negative ratings for two criteria, giving him 1/5 participation marks.

    Participation marks are available in this page.

    • The important column is the Weeks Count column. It tells you how many weeks you have met the bar for the criterion A). Your target is to hit 10 weeks.
    • Participation of a week is usually calculated based on two quizzes. For example, week 4 score is calculated based on,
      • W4-Q1: previous week's (i.e., lecture 3) in-lecture quiz
      • W4-Q2: previous week's (i.e., lecture 3) post-lecture quiz
    • Participation bar for weeks 1-3 have been simplified as follows (to account for late enrollments, LumiNUS problems etc.):
      • Week 1: submitted pre-module survey or pre-lecture quiz
      • Week 2: submitted at least one of the quizzes
      • Week 3: did reasonably in both quizzes or did well in one of the quizzes
    • Quizzes for Week 4 and thereafter are counted as explained in A above.

    If you have queries about the participation marks, please email cs2103@comp.nus.edu.sg.

    Admin Tutorials [Exchange Students: Tutorial Registration]

    [Exchange students only] Registering for tutorials:

    • Exchange students need to use the ORATUT system to register for the tutorials. You must have received the instructions from UG office on how/when to go about the registration process. If not, please talk to UG office. When we can see your appeal on ORATUT, we can allocate you to the tutorial slot.

    Admin Appendix C (FAQs) → What are the differences between the T and the non-T version of the module?

    What are the differences between the T and the non-T version of the module?

    Same lecture content (but possibly different lecture slots), same exam. Separate tutorials, separate project grading. Unless specified otherwise, whatever is stated for one module applies to the other.

    Admin Appendix C (FAQs) → Why the workload is so high?

    Why the workload is so high?

    CS2103/T prepares you for many higher-level project modules (CS3216/7, CS3203, CS3281/2, etc.), each requiring a slightly different skill set. It is also the only SE module some of you do before going for industry internships. Therefore, we have to cover many essential SE concepts/skills and also provide enough exercises for you to practice those skills. This is also why we don't have time to go very deep into any of the topics.

    Remember, everything you learn here is going to be useful in a SE-related career.

    Also, consider this a gradual introduction to 'heavy' modules; most project modules you do after this are going to be much heavier 😛

    How to reduce the workload? You can omit Learning Outcomes rated . Furthermore, control the project workload by using no more than a fixed amount of time weekly on the project (e.g., 1 day).

    Admin Appendix C (FAQs) → What are the extra requirements to get an A+?

    What are the extra requirements to get an A+?

    In CS2103/T, A+ is not given simply based on the final score. To get an A+ you should,

    • score enough to get an A
    • be considered technically competent by peers and tutor (based on peer evaluations and tutor observations)
    • be considered helpful by peers (based on peer evaluations and tutor observations)
      • In particular, you are encouraged to be active on the forum and give your inputs to ongoing discussions so that other students can benefit from your relatively higher expertise that makes you deserve an A+.
      • Whenever you can, go out of your way to review PRs created by other team members.

    5 Attend the lecture

    • Attend the Week 1 lecture (Week 1 lecture is compulsory).
    • Bring your computer to the lecture. Some lecture activities will need it.